
Install on Windows
On Windows you don’t type any commands. A small installer — install.bat —
downloads the compose file and starts the whole stack on a double-click. The only
manual work is two one-time GUI toggles a script can’t safely flip for you.
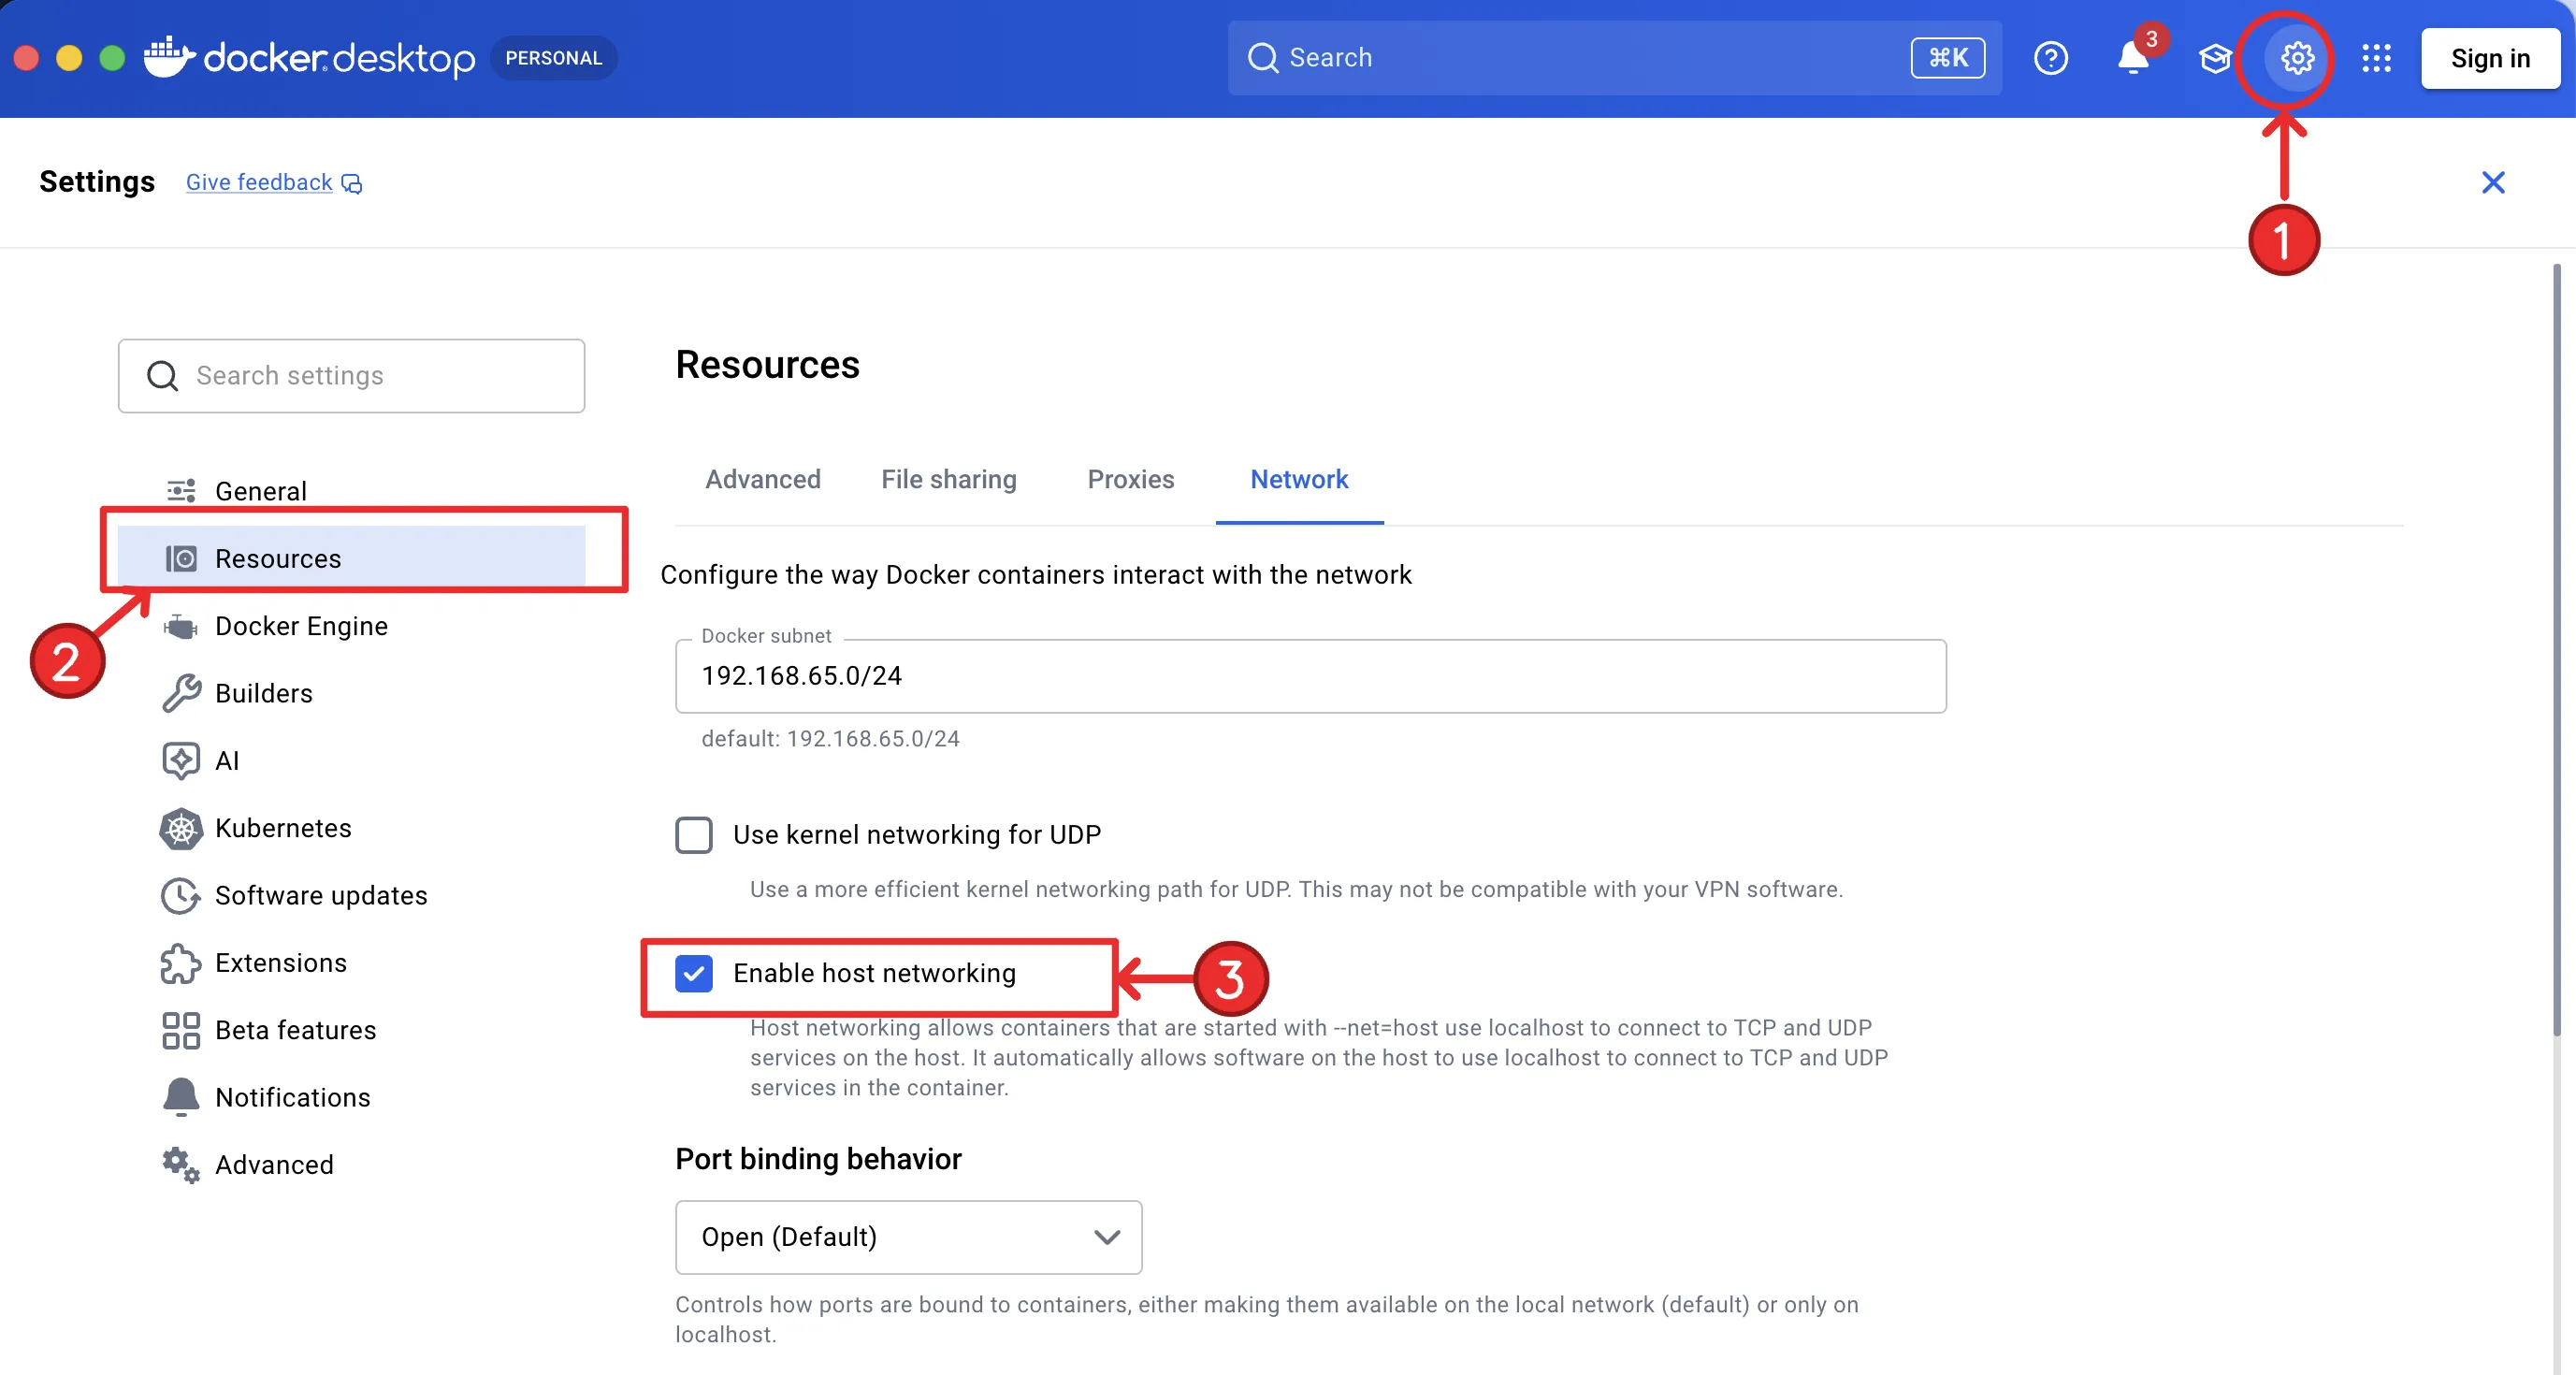
Docker Desktop — Settings → Resources → Network
-
Open Docker Desktop → Settings.
-
Go to Resources → Network.
-
Tick Enable host networking (beta), then Apply & restart.
With host networking on, the containers share Windows’ loopback — the bot starts its own adb bridge there and reaches BlueStacks, so there’s nothing for you to install or start by hand.
Install
Section titled “Install”Then:
-
Set the emulator profile in BlueStacks — 720 × 1280 @ 320 DPI, game language English. See Emulator setup; the dashboard warns you if the resolution or DPI is off, so you don’t have to check it by hand.
-
Double-click the downloaded
install.bat. A console window opens and the script:- checks that Docker Desktop is installed and running,
- downloads
docker-compose.prod.ymlinto%USERPROFILE%\autopilot, - pulls the images from the GitLab Container Registry mirror
(
registry.gitlab.com/batazor/autopilot) and starts redis + bot + api + web, - opens the dashboard for you.
-
When it finishes, the dashboard is at
http://127.0.0.1:3000/overview. Go to Devices (ADB) — your BlueStacks emulator shows up ready to add.
Updating
Section titled “Updating”To update to the latest release, just run install.bat again. It re-downloads
the compose file and pulls the newer images (--pull always) before recreating the
containers — your accounts and state in the Docker volumes are kept. See
Updating if a container gets stuck on the old
version.
Troubleshooting
Section titled “Troubleshooting”See Troubleshooting for the full list.